So you may have stumbled up on my guide because you have recently bought some SAS disks off eBay or elsewhere second hand at a great price but they are formatted to 520 Byte Block Size instead of 512 Byte Block Size then this guide is for you. When the Drive is in 520 Bytes Block Size you will encounter problems with creating ZFS Arrays, Badblocks, mdadm failure due to the unsupported block size.
Fortunately there is a way to convert these disks to 512 bytes block size using sg_format on either BSD or Linux.
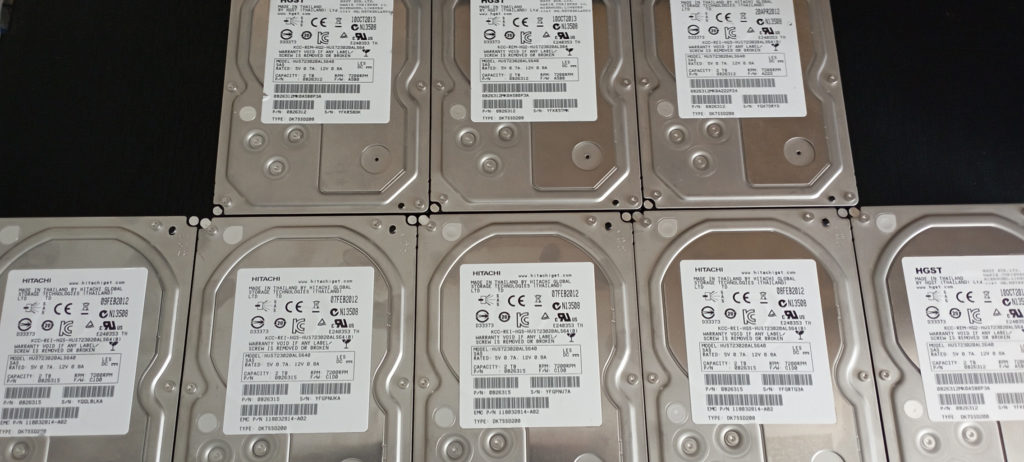
I recently bought some Hitatch HUS723020ALS64 or HGST HUS723020ALS64, some of these drives are removed from a Dell EMC Disk Shelf or Blade Servers but I have bought many of these disks to go in my iSCSI SANs and some were using 512 Byte Size and some wasn’t. So here’s what you got to look out for, you will notice the label on your disk shows the model as HUS723020ALS64 but smart or sg_format identifies the disk as HUS72302CLAR2000 that right there is a indicator that the drive is running Dells EMC Firmware. Please note this guide will also work on other branded disks.
Lets get started,
I would highly recommend checking the smart statistics or sg_format just to verify the block size not only that but to determine the model of the Drive you have. First we need to determine the drive,
Open Terminal type the following,
For Linux,
fdisk -lFor Linux the output of fdisk -l looks like the following,
Disk /dev/sda: 232.91 GiB, 250059350016 bytes, 488397168 sectors
Disk model: Samsung SSD 860
Units: sectors of 1 * 512 = 512 bytes
Sector size (logical/physical): 512 bytes / 512 bytes
I/O size (minimum/optimal): 512 bytes / 512 bytes
Disklabel type: gpt
Disk identifier: C318BDD5-249C-4E95-8B73-5B82931AB7EC

Device      Start       End   Sectors   Size Type
/dev/sda1    2048    448511    446464   218M EFI System
/dev/sda2  448512 488396799 487948288 232.7G Linux filesystem


Disk /dev/sdb: 223.58 GiB, 240057409536 bytes, 468862128 sectors
Disk model: INTEL SSDSC2BW24
Units: sectors of 1 * 512 = 512 bytes
Sector size (logical/physical): 512 bytes / 512 bytes
I/O size (minimum/optimal): 512 bytes / 512 bytes
Disklabel type: gpt
Disk identifier: 219BDB5E-68B8-41D8-ABDA-5D9DDB2EADB4

Device         Start       End   Sectors   Size Type
/dev/sdb1       2048    206847    204800   100M EFI System
/dev/sdb2     206848    468991    262144   128M Microsoft reserved
/dev/sdb3     468992 467787755 467318764 222.9G Microsoft basic data
/dev/sdb4  467787776 468858879   1071104   523M Windows recovery environment
For FreeBSD such as FreeNAS, TrueNAS etc
camcontrol devlistAs i am using FreeBSD to host my iSCSI Luns the following looks like,
root@vdn-san02:/ # camcontrol devlist
<ATA SanDisk SDSSDP06 0>           at scbus0 target 10 lun 0 (pass0,da0)
<ATA SanDisk SDSSDP06 0>           at scbus0 target 11 lun 0 (pass1,da1)
<ATA ST3000VN007-2AH1 SC60>        at scbus0 target 12 lun 0 (pass2,da2)
<ATA ST3000VN007-2E41 SC60>        at scbus0 target 13 lun 0 (pass3,da3)
<ATA ST3000VN007-2AH1 SC60>        at scbus0 target 14 lun 0 (pass4,da4)
<ATA ST3000DM008-2DM1 CC26>        at scbus0 target 15 lun 0 (pass5,da5)
<ATA ST3000VN000-1HJ1 SC60>        at scbus0 target 16 lun 0 (pass6,da6)
<ATA ST3000DM003-2AE1 0001>        at scbus0 target 17 lun 0 (pass7,da7)
<iDRAC LCDRIVE 0323>               at scbus2 target 0 lun 0 (da8,pass8)
<iDRAC Virtual CD 0323>            at scbus3 target 0 lun 0 (pass9,cd0)
In my case we are looking at da9 but replace da9 with the correct drive identifier, so in Terminal type the following, (Both works with BSD and Linux).
smartctl -x /dev/da9
or
smartctl -a /dev/da9

for sg_format,
sg_format /dev/da9
The output should look the same as follows,
Smart,

root@vdn-san02:/ # smartctl -x /dev/da9
smartctl 7.2 2020-12-30 r5155 [FreeBSD 12.2-RELEASE-p9 amd64] (local build)
Copyright (C) 2002-20, Bruce Allen, Christian Franke, www.smartmontools.org

=== START OF INFORMATION SECTION ===
Vendor:               HITACHI
Product:              HUS72302CLAR2000
Revision:             C1D6
Compliance:           SPC-4
User Capacity:        2,000,398,933,520 bytes [2.00 TB]
Logical block size:   520 bytes
Rotation Rate:        7200 rpm
Form Factor:          3.5 inches
Logical Unit id:      0x5000cca01b296fdc
Serial number:        YFGRTG3A
Device type:          disk
Transport protocol:   SAS (SPL-3)
Local Time is:        Sat Mar  5 18:50:58 2022 GMT
SMART support is:     Available - device has SMART capability.
SMART support is:     Enabled
Temperature Warning:  Disabled or Not Supported
Read Cache is:        Enabled
Writeback Cache is:   Enabled

=== START OF READ SMART DATA SECTION ===
SMART Health Status: OK

Current Drive Temperature:     40 C
Drive Trip Temperature:        85 C

sg_format

root@vdn-san02:/ # sg_format /dev/da9
    HITACHI   HUS72302CLAR2000  C1D6   peripheral_type: disk [0x0]
      << supports protection information>>
      Unit serial number: YGGLBLKA
      LU name: 5000cca01c2168e0
Mode Sense (block descriptor) data, prior to changes:
  Number of blocks=3846921026 [0xe54b5b42]
  Block size=520 [0x208]
Read Capacity (10) results:
   Number of logical blocks=3846921026
   Logical block size=520 bytes
No changes made. To format use '--format'. To resize use '--resize'
To take a look at the block size look at the following,
Logical block size: 520 bytes (This should be 512 Bytes)Lets convert the drive from 520 Bytes to 512 Bytes so we can use this with something like ZFS or mdadm etc. We are going to convert the drive using sg_format.
On Linux sg_format needs to be installed. BSD/FreeNAS/TrueNAS does not require to sg_format to be installed. To install in Terminal do the following,
sudo apt update
sudo apt install sg3-utils -y
Once installed we can use sg_format to also determine the drive is the correct by typing the following in Terminal, these next steps are the same for both Linux and BSD,
root@vdn-san02:/ # sg_format /dev/da9
    HITACHI   HUS72302CLAR2000  C1D6   peripheral_type: disk [0x0]
      << supports protection information>>
      Unit serial number: YGGLBLKA
      LU name: 5000cca01c2168e0
Mode Sense (block descriptor) data, prior to changes:
  Number of blocks=3846921026 [0xe54b5b42]
  Block size=520 [0x208]
Read Capacity (10) results:
   Number of logical blocks=3846921026
   Logical block size=520 bytes
No changes made. To format use '--format'. To resize use '--resize'
So once we have determined that the drive is correct we can now tell sg_format to convert the drive to 512 Byte Block size. In Terminal type as follows,
sg_format -v --format --size=512 /dev/da9Now sg_format will now convert the drive the output should look something like this,
root@vdn-san02:/ # sg_format -v --format --size=512 /dev/da9
    HITACHI   HUS72302CLAR2000  C1D6   peripheral_type: disk [0x0]
      PROTECT=1
      << supports protection information>>
      Unit serial number: YGGLBLKA
      LU name: 5000cca01c2168e0
    mode sense(10) cdb: [5a 00 01 00 00 00 00 00 fc 00]
Mode Sense (block descriptor) data, prior to changes:
  Number of blocks=3846921026 [0xe54b5b42]
  Block size=520 [0x208]
    mode select(10) cdb: [55 11 00 00 00 00 00 00 1c 00]

A FORMAT UNIT will commence in 15 seconds
    ALL data on /dev/da9 will be DESTROYED
        Press control-C to abort

A FORMAT UNIT will commence in 10 seconds
    ALL data on /dev/da9 will be DESTROYED
        Press control-C to abort

A FORMAT UNIT will commence in 5 seconds
    ALL data on /dev/da9 will be DESTROYED
        Press control-C to abort
    Format unit cdb: [04 18 00 00 00 00]

Format unit cdb: [04 18 00 00 00 00]

Format unit has started
Format in progress, 0.99% done
Format in progress, 0.99% done
Format in progress, 1.99% done
Now this is the waiting game, Once it is completed we then use smart or sg_format to determine the block size of the newly converted disk, In Terminal type the following,
smartctl -x /dev/da9
or
smartctl -a /dev/da9

for sg_format,
sg_format /dev/da9
The output should look something like this,
Smart,

root@vaultmort:/ # smartctl -x /dev/da9
smartctl 7.2 2020-12-30 r5155 [FreeBSD 12.2-RELEASE-p9 amd64] (local build)
Copyright (C) 2002-20, Bruce Allen, Christian Franke, www.smartmontools.org

=== START OF INFORMATION SECTION ===
Vendor:               HITACHI
Product:              HUS72302CLAR2000
Revision:             C1D6
Compliance:           SPC-4
User Capacity:        2,000,398,934,016 bytes [2.00 TB]
Logical block size:   512 bytes
Rotation Rate:        7200 rpm
Form Factor:          3.5 inches
Logical Unit id:      0x5000cca01b296fdc
Serial number:        YFGRTG3A
Device type:          disk
Transport protocol:   SAS (SPL-3)
Local Time is:        Sat Mar  5 23:13:43 2022 GMT
SMART support is:     Available - device has SMART capability.
SMART support is:     Enabled
Temperature Warning:  Disabled or Not Supported
Read Cache is:        Enabled
Writeback Cache is:   Enabled

=== START OF READ SMART DATA SECTION ===
SMART Health Status: OK

Current Drive Temperature:     45 C
Drive Trip Temperature:        85 C

sg_format,

root@vdn-san02:/ # sg_format /dev/da9
    HITACHI   HUS72302CLAR2000  C1D6   peripheral_type: disk [0x0]
      << supports protection information>>
      Unit serial number: YGGLBLKA
      LU name: 5000cca01c2168e0
Mode Sense (block descriptor) data, prior to changes:
  Number of blocks=3846921026 [0xe54b5b42]
  Block size=520 [0x208]
Read Capacity (10) results:
   Number of logical blocks=3846921026
   Logical block size=512 bytes
No changes made. To format use '--format'. To resize use '--resize'
Now look at the Logicial Block Size,
Logical block size: 512 bytesHopefully by now your drive is converted to 512 Byte Block Size, this is great you can now go on and run badblocks on this drive and start using it with ZFS, mdadm etc.
I hope this guide helps. Enjoy