Note this guide is from Jul 8 2016, the reason why i’m re-posting this on my new site is because some people still want to use Windows 7. Please note some newer machines will not work with Windows 7 with this guide because the Drive is in MBR not GPT.
Things you will need,
- A Copy of Windows 7 thats either downloaded from Microsoft or a Genuine Install DVD Disk Please note that you will need to have a Windows 7 Disk that is Service Pack 1 or this guide will not work. Microsoft provides you with Service Pack 1 when downloading from Microsoft Website. Link https://www.microsoft.com/en-gb/software-download/windows7
- A 8GB or 16GB or 32GB Boot Stick. In my case i used a 8GB Flash drive.
- A Computer that is already running Windows 7. Note that Windows 8.1 and Windows 10 has its own built in ISO Mounter.
- A Program that lets you unzip files. In my case i used 7-Zip.
So Lets get Started. You will need to mount the ISO image in Virtual Mounter. For example i used Virtual Clone drive you can use your preferred ISO Mounter.
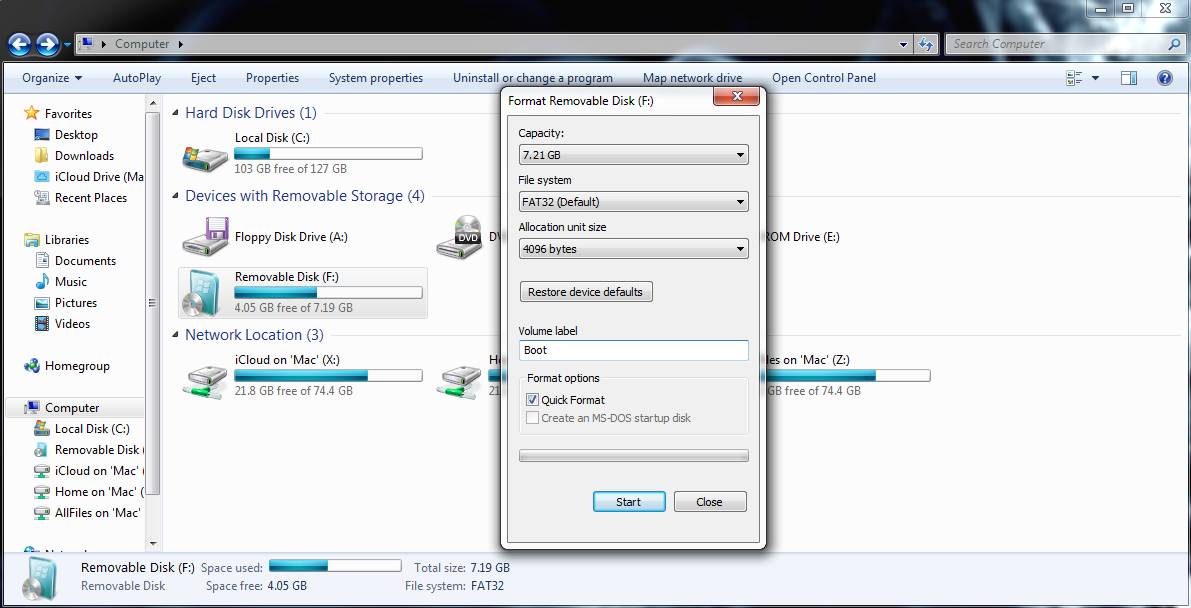
Now we need to prepare our Flash drive. We need to Format it as Fat32.
So to format the Flash drive to Fat32. Go into Start, Computer, Right Click on Removable Disk in my case its (F:)
So once you’ve formatted the drive to Fat 32 we can get onto mounting the ISO image and create our Windows 7 UEFI Boot Stick.
So the first thing we need to do is copy the Windows 7 files to the Flash drive. In this case we can just copy and paste its as easy as that. You will need to mount the ISO use your preferred ISO mounter.
So now once we’ve mounted the ISO Image we can now copy the files to the Flash Drive. Copying and Pasting to the Flash drive.
So once the Windows 7 files are done copying we can now move some files to make the Windows 7 Flash stick into UEFI.
Now you will need to come under EFI. You will see a folder called Microsoft. We need to create a folder called Boot.
So now once creating a folder called Boot we need to copy some files from the microsoft, Boot folder and copy them into the folder we just created called Boot.
So now we’ve coped those files to the Boot folder we made. We need to go to Sources, Scroll down till you see a Install.WIMM file so now we need to open that with a program that can unzip it in my case i used a program called 7-ZIP. Once we’ve opened the file called Install.WIMM we need to go to a folder called 1.
Once we opened up the folder called 1. You will need to click on a folder called Windows.
Now you will need to open a folder called Boot.
Now once you will see a Folder called EFI. There are some boot files you need to copy from this folder in order to boot and install Windows 7 in UEFI. So the file you need to copy is called bootmgfw.efi.
So now we need to copy the file called bootmgfw.efi to the folder we created earlier called Boot.
Once you’ve copied the file to the Boot folder we created earlier we now need to rename it to BOOTX64.
So now once you’ve done that. You’re Windows 7 Flash Drive can now boot in UEFI. Recommend installing Windows 7 in UEFI if you’re dual booting with Clover in UEFI. Enjoy.